Nuclear Reactor: Difference between revisions
(added fuel rods info, since all fuel rods redirect to this page) |
Jade Harley (talk | contribs) (Rewrote "Function" and "Usage" sections, removed "Trivia" section, and added tutorials to the "Usage" section.) |
||
| Line 5: | Line 5: | ||
| imagewidth = 300 | | imagewidth = 300 | ||
| category = Machines | | category = Machines | ||
| itemslots = 4 | | itemslots = 4 [[Fuel Rod|Fuel Rods]] | ||
| repair = | | repair = mechanical | ||
| construction = | | construction = 55 | ||
| mechanicalitems = | | mechanicalitems = [[Wrench]] | ||
}} | }} | ||
The '''nuclear reactor''' is the most crucial installation found in ''[[Barotrauma]]''. It acts as the [[:Category:Submarines|submarine]]'s | The '''nuclear reactor''' is the most crucial installation found in ''[[Barotrauma]]''. It acts as the [[:Category:Submarines|submarine]]'s main power source for all installations. | ||
== Function == | == Function == | ||
The nuclear reactor's | The nuclear reactor's function is to generate power for other installations on the submarine. As long as the reactor is active, every other device on the ship will remain active as well. Power generated by the reactor is sent to other installations via [[wiring]]. Power distribution reqires [[Junction Box|Junction Boxes]] to work, as the reactor cannot send power to other installations directly. Maintaining the power network is one of the most important aspects of a round, as the submarine cannot function without power. | ||
The nuclear reactor undergoes a process called [[wikipedia:Nuclear fission|nuclear fission]], in which atoms are split apart, cause large amounts of energy to be released. The rate at which these reactions take place is measured by the fission rate. The resulting reaction also causes heat to be released that will raise the overall temperature of the reactor. If the temperature | The nuclear reactor undergoes a process called [[wikipedia:Nuclear fission|nuclear fission]], in which atoms are split apart, cause large amounts of energy to be released. The rate at which these reactions take place is measured by the fission rate. The resulting reaction also causes heat to be released that will raise the overall temperature of the reactor. If the temperature raises past 6,000 degrees, the reactor will catch on fire after 20 seconds, and explode after 120 seconds, destroying nearby structures, killing any crewmate or creature who are close enough, and effectively destroying the submarine. It is possible to fix the submarine after a meltdown, however it is extremely difficult due to radiation and lack of power and walls. Because of this, the cooling and fission rates must be adjusted to keep the temperature at a desired level - which is usually the same as the amount of power consumed by the electrical grid of the submarine. | ||
A ''' | A '''[[Fuel Rod]]''' is required for the nuclear reactor to function since, as its name suggests, it supplies the reactor with fuel. The reactor can hold a combined total of four rods, though only putting in 1-2 rods is advised, as he reactor can overheat easily when supplied with too many. | ||
If the reactor is submerged in water, it will take | If the reactor is submerged in water, it will take damage at a faster rate than normal, though will still continue to run. This can be vital in an emergency situation where repairing a flooded ship is necessary in completing your objectives. It should also be noted that a reactor will not sound an alarm when close to melting down due to damage. It will not explode if it does not contain fuel, or if it is shut off. | ||
== Usage == | == Usage == | ||
[[File:Reactor panel.png|thumb|right|350px|The nuclear reactor's control panel.]] | [[File:Reactor panel.png|thumb|right|350px|The nuclear reactor's control panel.]] | ||
When | When a reactor is selected, this control panel opens up. The panel displays two gauges, a bar graph, and a line graph: each representing the fission rate, turbine output, temperature, and reactor load/output respectively. | ||
In this control panel, | In this control panel, players can '''manually''' set the fission rate and turbine output of the nuclear reactor, or have it controlled '''automatically'''. | ||
=== Manual Control === | |||
# Start the reactor using the button on the top-right labelled "Power". The light next to the button should glow. | |||
# Turn off automatic control using the switch on the top-right labelled "Automatic Control". The light next to the switch should be off. | |||
# Insert 1-2 fuel rods depending on their type, and the amount of power required. | |||
# Increase the fission rate and turbine output until they are in the green zones of their respective gauges. | |||
# Make sure the temperature is between the red markers on the bar graph, and that the lines on the line graph match closely. | |||
# Replace the fuel rods when they become empty. | |||
# Repeat steps 3-6. | |||
* Note that high turbine output will cause the reactor to lose temperature quickly, and must be accounted for with high fission rate, which is dangerous. | |||
* Also note that with this method, the reactor will need to be adjusted 24/7, as ballast pumps and the engine constantly change their power requirement. | |||
=== Automatic Control (Recommended) === | |||
# Start the reactor using the button on the top-right labelled "Power". The light next to the button should glow. | |||
# Turn on automatic control using the switch on the top-right labelled "Automatic Control". The light next to the switch should be on. | |||
# Insert 1-2 fuel rods depending on their type, and the amount of power required. | |||
# Check back every so often to make sure the fuel rods are not empty. If they are, replace them. | |||
* Note that automatic control reacts to changes in load slower than a human can, but is much more reliable. | |||
== Fuel Rods == | == Fuel Rods == | ||
{| class="wikitable sortable" | {| class="wikitable sortable" | ||
! style="width: 10%;" | Fuel Rod Type | ! style="width: 10%;" | Fuel Rod Type | ||
| Line 96: | Line 95: | ||
== Connection Panel == | == Connection Panel == | ||
{{Connection panel | {{Connection panel | ||
| input1 = | | input1 = Shutdown | ||
| input1tt = When it receives any signal | | input1tt = When it receives any signal, fission rate and turbine output are set to 0, and reactor is turned off. | ||
| output1 = | | input2 = Set_Fissionrate | ||
| output1tt = | | input2tt = Sets fission rate to a fixed percentage (0-100) | ||
| output2 = | | input3 = Set_Turbineout | ||
| output2tt = Sends out the reactor's current temperature. | | input3tt = Sets turbine output to a fixed percentage (0-100) | ||
| output3 = | | output1 = Power_Out | ||
| output3tt = | | output1tt = Power output of the reactor. | ||
| output2 = Temperature_Out | |||
| output2tt = Sends out the reactor's current temperature (0-10000). | |||
| output4 = | | output3 = Meltdown_Warning | ||
| output3tt = Sends a signal of 1 when reactor is high temp (>6000). | |||
| output4 = Power_Value_Out | |||
| output4tt = Sends the current power level as a number (supplied power). | | output4tt = Sends the current power level as a number (supplied power). | ||
| | | output5 = Load_Value_Out | ||
| | | output5tt = Sends the current load level as a number (required power). | ||
| output6 = | | output6 = Fuel_Out | ||
| output6tt = Sends out the current fuel level as a number}} | | output6tt = Sends out the current fuel level as a number (see Fuel Rods). | ||
}} | |||
== Audio == | == Audio == | ||
Revision as of 05:04, 24 October 2020
Template:Outdated Template:Cleanup
| Nuclear Reactor | ||||||||
|---|---|---|---|---|---|---|---|---|

| ||||||||
| Statistics* | ||||||||
| Item Slots | 4 Fuel Rods | |||||||
| ||||||||
The nuclear reactor is the most crucial installation found in Barotrauma. It acts as the submarine's main power source for all installations.
Function
The nuclear reactor's function is to generate power for other installations on the submarine. As long as the reactor is active, every other device on the ship will remain active as well. Power generated by the reactor is sent to other installations via wiring. Power distribution reqires Junction Boxes to work, as the reactor cannot send power to other installations directly. Maintaining the power network is one of the most important aspects of a round, as the submarine cannot function without power.
The nuclear reactor undergoes a process called nuclear fission, in which atoms are split apart, cause large amounts of energy to be released. The rate at which these reactions take place is measured by the fission rate. The resulting reaction also causes heat to be released that will raise the overall temperature of the reactor. If the temperature raises past 6,000 degrees, the reactor will catch on fire after 20 seconds, and explode after 120 seconds, destroying nearby structures, killing any crewmate or creature who are close enough, and effectively destroying the submarine. It is possible to fix the submarine after a meltdown, however it is extremely difficult due to radiation and lack of power and walls. Because of this, the cooling and fission rates must be adjusted to keep the temperature at a desired level - which is usually the same as the amount of power consumed by the electrical grid of the submarine.
A Fuel Rod is required for the nuclear reactor to function since, as its name suggests, it supplies the reactor with fuel. The reactor can hold a combined total of four rods, though only putting in 1-2 rods is advised, as he reactor can overheat easily when supplied with too many.
If the reactor is submerged in water, it will take damage at a faster rate than normal, though will still continue to run. This can be vital in an emergency situation where repairing a flooded ship is necessary in completing your objectives. It should also be noted that a reactor will not sound an alarm when close to melting down due to damage. It will not explode if it does not contain fuel, or if it is shut off.
Usage

When a reactor is selected, this control panel opens up. The panel displays two gauges, a bar graph, and a line graph: each representing the fission rate, turbine output, temperature, and reactor load/output respectively.
In this control panel, players can manually set the fission rate and turbine output of the nuclear reactor, or have it controlled automatically.
Manual Control
- Start the reactor using the button on the top-right labelled "Power". The light next to the button should glow.
- Turn off automatic control using the switch on the top-right labelled "Automatic Control". The light next to the switch should be off.
- Insert 1-2 fuel rods depending on their type, and the amount of power required.
- Increase the fission rate and turbine output until they are in the green zones of their respective gauges.
- Make sure the temperature is between the red markers on the bar graph, and that the lines on the line graph match closely.
- Replace the fuel rods when they become empty.
- Repeat steps 3-6.
- Note that high turbine output will cause the reactor to lose temperature quickly, and must be accounted for with high fission rate, which is dangerous.
- Also note that with this method, the reactor will need to be adjusted 24/7, as ballast pumps and the engine constantly change their power requirement.
Automatic Control (Recommended)
- Start the reactor using the button on the top-right labelled "Power". The light next to the button should glow.
- Turn on automatic control using the switch on the top-right labelled "Automatic Control". The light next to the switch should be on.
- Insert 1-2 fuel rods depending on their type, and the amount of power required.
- Check back every so often to make sure the fuel rods are not empty. If they are, replace them.
- Note that automatic control reacts to changes in load slower than a human can, but is much more reliable.
Fuel Rods
| Fuel Rod Type | Fuel Amount | Mechanical Skill to Craft | Crafting Materials | Crafting Time | Store Price |
|---|---|---|---|---|---|
 Uranium Fuel Rod |
80 | 25 | File:Steel.png Steel |
10 | 135-150 Marks |
 Thorium Fuel Rod |
100 | 60 | File:Steel.png Steel |
10 | 225 Marks |
 Fulgurium Fuel Rod |
150 | 40 | File:Steel.png Steel |
10 | Not purchasable |
Damage Values
| Item |
Attack Damage |
Structure Damage |
Stun Duration |
Kinetic Force |
Explosion Radius (m) |
|---|---|---|---|---|---|
| Reactor Meltdown |
500 |
600 |
5 |
5.0 |
6 |
Connection Panel
| Connection Panel for Nuclear Reactor Hover over pins to see their descriptions. | ||||||||||||||||||||||||||||||||||||||||||||||||||||||||||||||||
|---|---|---|---|---|---|---|---|---|---|---|---|---|---|---|---|---|---|---|---|---|---|---|---|---|---|---|---|---|---|---|---|---|---|---|---|---|---|---|---|---|---|---|---|---|---|---|---|---|---|---|---|---|---|---|---|---|---|---|---|---|---|---|---|---|
| ||||||||||||||||||||||||||||||||||||||||||||||||||||||||||||||||
| Requires: | ||||||||||||||||||||||||||||||||||||||||||||||||||||||||||||||||
Audio
-
Reactor active ambience
-
Reactor overheat alarm
Gallery
-
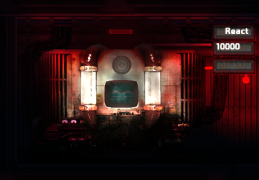
A Nuclear Reactor during a meltdown.
-
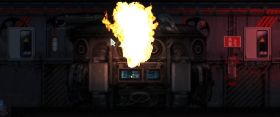
A Nuclear Reactor on fire.


| Installations | |
|---|---|
| Submarine Weapons | |
Small Turrets
|
Large Turrets
|
Loaders
| |
Other
| |
| Navigation | |
| Machines | |
| Electrical | |
| Structure | |
| Other | |
| Alien | |


